data=/etc/cogix/vfdata (on Windows, use C:\\etc\\cogix)
apiattribute=com.cogix.vwf.api
NOTE: If you don't want to use /etc/cogix for viewsflash.properties, then unpack the ViewsFlash.war file, modify WEB-INF/web.xml to include a propertiesfile initiparam that points to where you want to store viewsflash.properties, and repack the ViewsFlash.war file. The web.xml file includes a commented out section that does this. You can also specify the parameters as initparam entries in web.xml and avoid using viewsflash.properies altogether.
appsecurity=user
administrators=wpsadmin
datasource=jdbc/MyNamedDataSource
To use a new datasource, create one and name it "ViewsFlash". To use the built-in Derby database, add:
database=Derby
datasource=jdbc/built-in-derby-datasource
license=who=Demo_License;type=unlimited;exp=07/31/05;bdb=y;bua=y;brs=y;bwp=y;licensekey=63-85-90-91-0E-07-2E-AC-E7-9A-F1-BB-17-C5-AB-87-
Without a license key, the application will work for approximately 30 days, and every page will include an "Evaluation Copy" message. For an evaluation license key, contact sales@cogix.com and include it in viewsflash.properties later.
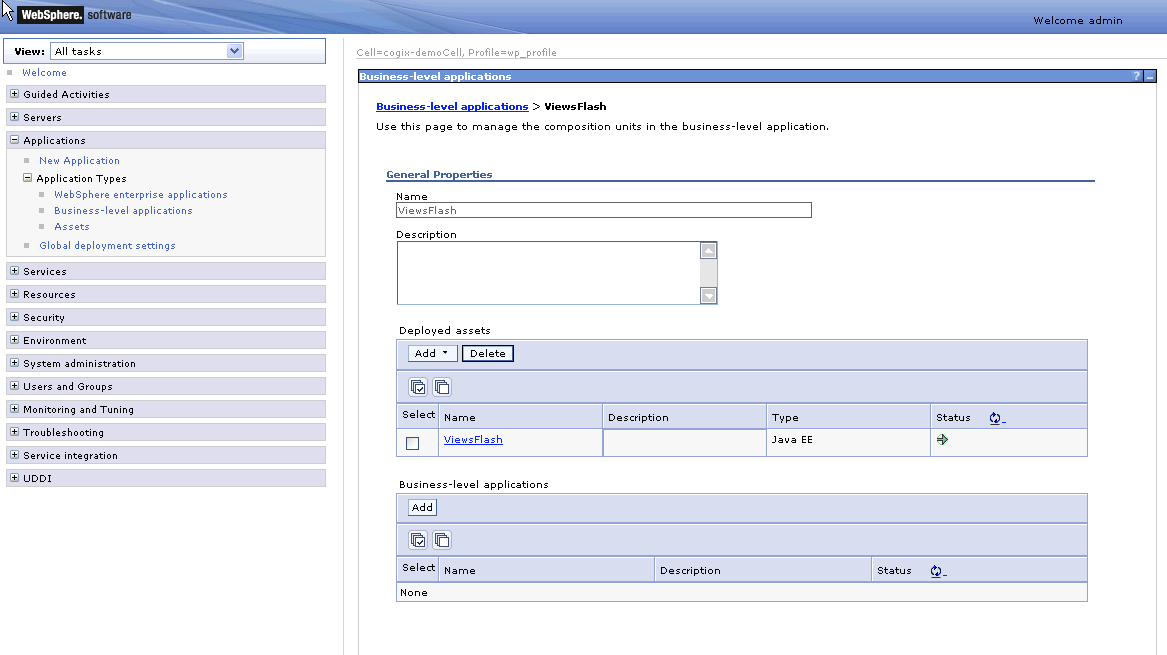
Open the WAS management console at https://yourportal.com:10032/ibm/console
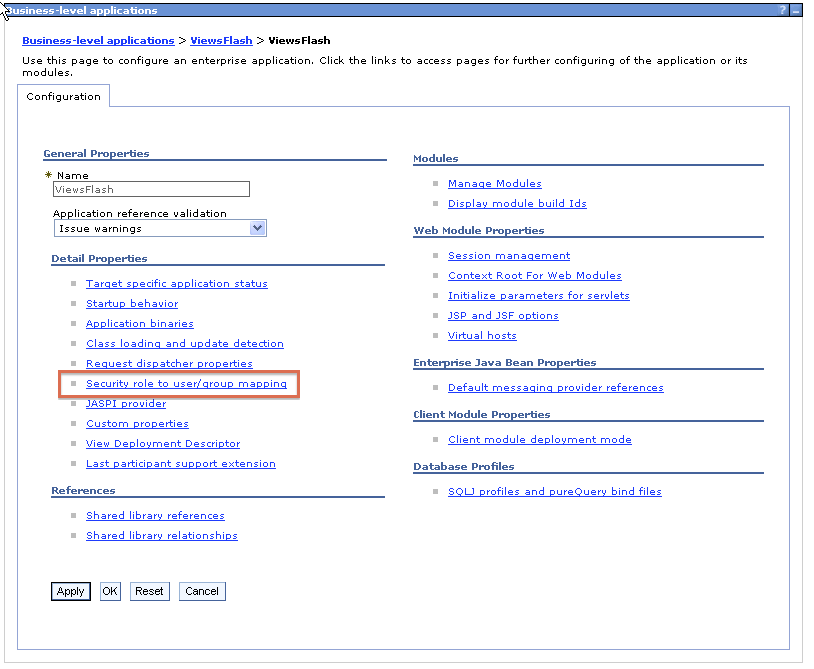
Open Applications, click on Business-level Applications, and look for ViewsFlash and click on the name. Once you select ViewsFlash off the list you are presented with General Properties please click on ViewsFlash in the Deployed assets table.
Once you reach the configuration page click on the link for 'Security role to user/group mapping' in the Detail Properties list.
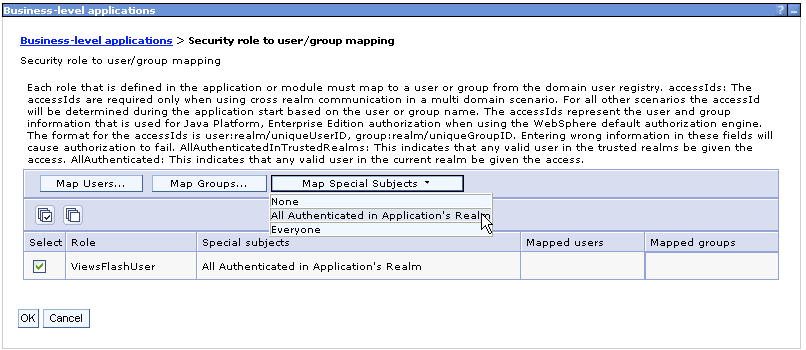
Click on the check box next to the role ViewsFlashUser and select "All Authenticated in Application's Realm" from the "Map Special Subjects" drop down. Press OK. You should immediately see a message "Changes have been made to your local configuration (if you do not, stop and check the WebSphere Application Server logs for error messages, and make sure the latest patches have been applied). Click Save to apply changes to the master configuration". Click on Save, then press the Save button.
When that completes, WebSphere Portal Server must be restarted for the changes to take effect. Do not proceed any further with the Survey portlet until WebpShpere Portal Server has ben restarted.